This is my take on the Toads and Frogs logic puzzle. Instead of Frogs and Toads however, I will be using one of my favorite animals, the mighty ostrich.
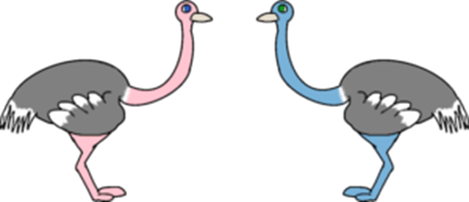
“Three pink ostriches are heading south to get home and run into three blue ostriches on a very narrow path in the savanna. The three blue ostriches are also heading home but their home is to the North. Neither group will give way to the other, they are very stubborn ostriches indeed, Luckily, the birds have strong legs and can hop over one another but they can only hop over one at a time. To complicate things further, these ostriches are especially stubborn meaning that neither of them will move backwards and neither of them will leave the area until all three of their group are cleared to leave the area. Help them on their way without getting them stuck!“
This type of game, usually called hop-over or toads and frogs or something along those lines, involves trying to swap the things on the right with the things on the left moving only one object at a time. They can either slide forward one space or jump over one other object, moving two spaces, but each object can only move forward. It’s fairly straight forward and actually pretty easy to create. Typically, in these games, one particular object cannot jump over an identical object, for example a toad cannot jump over a toad, only a frog. The things starting on the right side generally can only hop over an object if it came from the left side and vice-versa. I have relaxed that rule for my game, that is one of the perks of creating things yourself, you get to make the rules. Anyway, here is the setup:
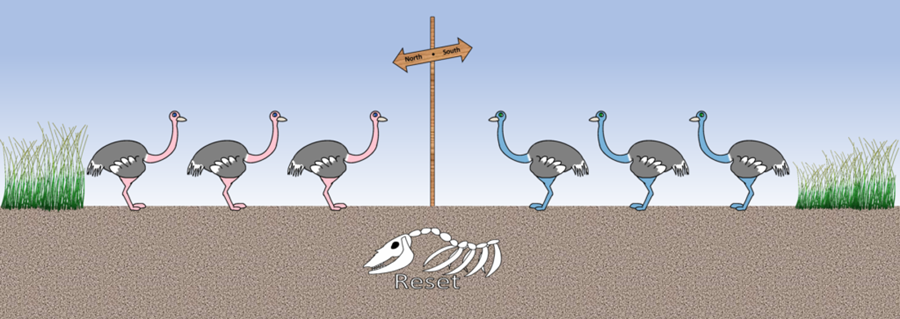
In my game, the user simply clicks on the image they want to move. If the image can move to the blank space then it will do so but only if the move is a forward move for the piece, no backward moves are allowed. If it cannot move forward then nothing happens. Once all the objects have switched places then the game informs you that you have won or, if all the pieces are stuck and cannot move, the game informs you as such and asks if you would like to reset. The VBA for this is very short but there is some good stuff in there so let’s take a look.
The play area for me is range F4 to L4, I chose this somewhat arbitrarily. Row 4 will hold all the action this time so what I did was fill it with 0’s. This denotes a space that cannot be occupied. Next, place a 1 in cells F4, G4, and H4, the 1 will represent the pink or southward moving ostrich. Place a 2 in cells J4, K4, and L4, the 2 represents the blue or northward moving ostrich. Cell I4 should be blank which represents the blank cell. Very obvious that one. And here is what that looks like:
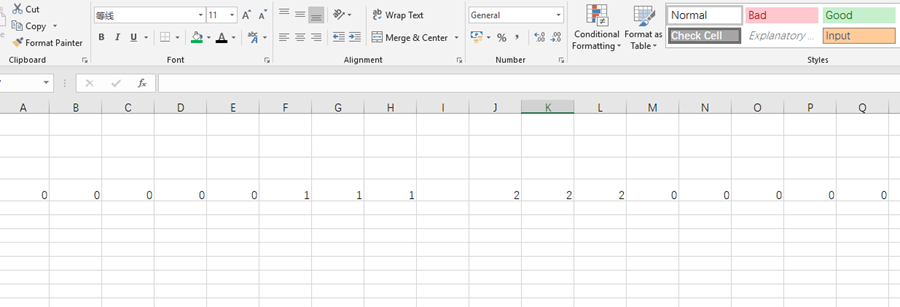
The only thing that I will add to this setup are images over the numbers but you are looking at the skeleton of the project.
Now, hide the numbers. In the past I have done this by making the text the same color as the background but another way is to set the number format to “”. To do this right click the cells and select format cells. Under the number tad click custom and enter “” in the field. (I later covered the cells with an image but it’s good practice to know how to hide text anyway).

Now the text will be hidden. Nifty!
I will now break down the logic of the game mechanics. First, the user will click on an image, the macro will obtain that image’s name and cell address. Next, check to see if there is a blank cell that the image can move to by looking at the cells to it’s left and right. If the blank cell isn’t in range then simply do nothing. If the blank cell is within range then cut the current cell and and move it to the address of the blank cell. Finally, add up the numbers on either side and if the totals match the winning conditions then it is game over, have a message box pop up stating just that.
Here is sub “move.” The first two variables you shall see are “name” and “nameaddress”. “name” will be equal to the name of the image that the user has clicked on and “nameaddress” will be the cell address of the image that the user has clicked on. To collect the “name” variable I used the Application.Caller function (which I probably could have used it in previous blogs but, oh well, it’s a fun one). Caller gathers information about how the macro was called. As you can see below, I ask for the name of the shape that initiated the macro and store that name in variable “name.” If the user clicks on ostrich number 3 then the macro will initiate with name becoming equal to “Os 3.” Caller is cool. Once we have the name of the image, we need the cell that the image resides in, that’s easy to collect. Simply set nameaddress equal to the cell address where the top left corner of the image resides.
Sub move()
name = ActiveSheet.Shapes(Application.Caller).name
nameaddress = ActiveSheet.Shapes(name).TopLeftCell.Address
Next comes the loop. The parameters will vary depending on if the ostrich is heading left or right. All the ostriches going right are numbers 3 or below so I’ll begin with them. Clip off the image’s number by using the “Split” command. The number in this case follows a space so Excel is instructed to spilt the name at the space. This creates an array with two pieces of information, the first and second parts of the split-up name. This is easy to code in, simply chose a variable name, mine is “numb” for number, and set it equal to Split(“the string you want to split up”, “[the deliminator]”)
For example: numb = Split(“Os 2”, “ “)
Now numb has two parts, numb(0) and numb(1). numb(0) is equal to “Os” and numb(1) is equal to 2. We are interested in the second one, the number.
After obtaining the number, use an if statement to see if it is the upper three or lower three. For numbers one to three we only need to check two cells, the one directly to the right and the one just after that.
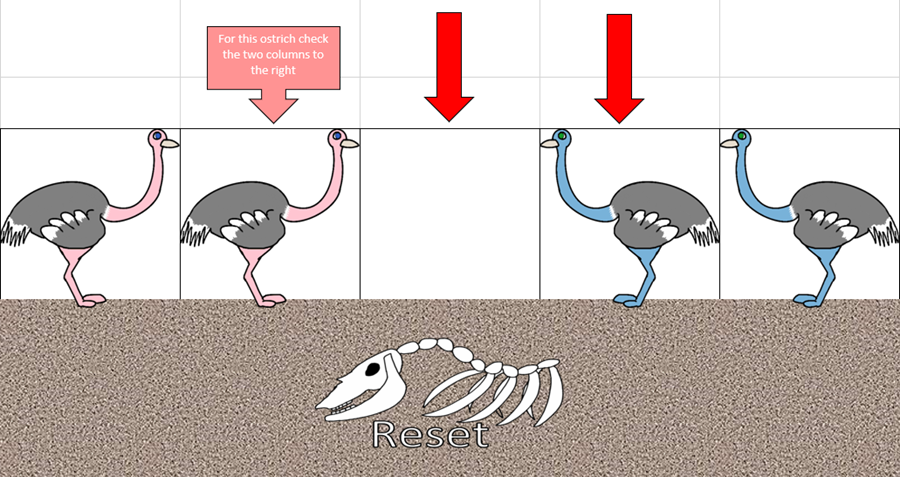
To investigate those cells we are going to use the ever popular offset method, we’ll need to check the cell 1 column to the right, then two columns to the right. So the lower bound should be 1 with the upper bound being 2, this means the loop only runs twice. Should the ostrich be heading to the left then the exact same logic holds true only this time we have to investigate the cell 1 column to the left then 2 columns to the left, meaning the lower bound is now -2 and the upper bound is -1. I used “ll” for lower limit and “tl” for top limit, you can see those parameters being assigned below:
numb = Split(name, ” “)
If numb(1) <= 3 Then
ll = 0
tl = 2
Else
ll = -2
tl = 0
End If
If an empty cell is found then the image will jump there. No additional work is required since there should only ever be one empty cell. If an empty cell is found then cut everything in the image’s cell and paste it into the empty cell. This will move the ostrich from it’s current home and into the blank cell. It will also leave a hole so make sure to fill that hole with the background color. Here is that loop.
For c = ll To tl
If Range(nameaddress).Offset(0, c).Value = “” Then
emp = Range(nameaddress).Offset(0, c).Address
Range(nameaddress).Cut Destination:=Range(emp)
Range(nameaddress).Interior.Color = 16644831
End If
Next c
Check the adjacent cell, if the cell is blank (has a value of “”) then set “emp” equal to the address of the empty cell. Then cut and paste the current image and cell value into that cell. If no blank is found then nothing will happen.
Finally, run a check after each click just to see if the user has won yet. Each pink ostrich is worth 1 and each blue ostrich is worth 2 so the three cells on the right of the playing field should add up to 3 and the three cells to the left should add up to 6. If that condition is met, then game over! If a win hasn’t been secured call another macro to see if there are any remaining moves and if there aren’t a prompt will be sent to the user asking if they desire a reset. I also always have this macro re-select cell A1 to get the cursor out of the way and so any images are un-selected.
If WorksheetFunction.Sum(Range(“F4:H4”)) = 6 And WorksheetFunction.Sum(Range(“J4:L4”)) = 3 Then
MsgBox (“You Win!”)
Else
Call check_fail
End If
Cells(1, 1).Activate
End Sub
Just two more macros to look at, reset and check_fail. First, I’ll walk you through check_fail. The value of a single variable will determine wether or not any more moves are available, that variable is called “nowheretogo,” so start it off equal to 0. Each ostrich has the potential to move into one of two spaces per turn. If both of those spaces are occupied (or illegal as in the spaces out of bounds) then I will increase nowheretogo by 1 for each unavailable space. After looping through the potential moves for each ostrich I should have a number either equal to or below 12 (6 ostriches x 2 potential moves each). If it is equal to twelve that means there are no avaible moves for any ostrich and that will trigger a prompt asking the user if they want to reset. Here’s the VBA:
Sub check_fail()
nowheretogo = 0
For n = 1 To 3
namey = (“Os ” & n)
nameaddress = ActiveSheet.Shapes(namey).TopLeftCell.Address
For c = 1 To 2
If Range(nameaddress).Offset(0, c).Value <> “” Then
nowheretogo = nowheretogo + 1
End If
Next c
Next n
That first loop only applies to the pink ostriches, this next loop applies to the blue ones:
For n = 4 To 6
namey = (“Os ” & n)
nameaddress = ActiveSheet.Shapes(namey).TopLeftCell.Address
For c = -2 To -1
If Range(nameaddress).Offset(0, c).Value <> “” Then
nowheretogo = nowheretogo + 1
End If
Next c
Next n
After each loop has finished looping it’s time to inspect the number stored in nowheretogo. If it is 12 then program in a message box to pop up. Set res (for response) equal to the user’s response and if that response is vbYes then call reset, otherwise do nothing. You can see that below, I have simply modified a normal “msgbox” pop up to include the yes or no buttons by adding “vbYesNo” into the message box instructions.
If nowheretogo = 12 Then
res = MsgBox(“The ostriches are stuck! Would you like to reset?”, vbYesNo)
If res = vbYes Then Call reset
End If
End Sub
That’s it for check_fail! Only one more to go!
The first thing reset will do is format the play area, meaning it will clear the area of numbers and set the format to hide any future numbers. Those commands are really easy and are shown here:
Sub reset()
Range(“F4:L4”).ClearContents
Range(“F4:L4”).NumberFormat = “”””””
And, again, it’s probably not necessary to hide the numbers anymore since I stuck an image over them later but I left it in in case anyone wanted to see the VBA for that.
Next, each ostrich must be placed in their respective cells and under each pink ostrich there should be a 1, under each blue ostrich a 2. Begin by setting “osval” for ostrich value, equal to 1 and set c equal to 6 because we are starting in column 6. Set up a For Loop that will move from cell F4 through cell L4. I used a variable “o” and had it assume the number of the ostrich, starting at 1. Each time the loop places a number 1 in a cell (starting at F4, cells(4,6), place image “Os “ + o in that cell as well and resize the image so that it fits perfectly into the cell. On the next loop, for cells(4,7), o will now = 2, so ostrich “Os 2” will be placed there and so on. Just remember to increase ”o” by 1 after each iteration. That loop will run for columns 6 through 8. After finishing the third loop and completing the requirements of column 8, we want it to skip one column and increase osval by 1 so that the blue ostriches are labeled with 2’s. That is done using an if statement. If c = 8 then simply increase it to 9 and increase osval by 1 before continuing the loop to completion. Not so difficult and saves us writing two separate loops.
o = 1
c = 6
osval = 1
Do Until c = 13
Cells(4, c).Value = osval
ActiveSheet.Shapes(“Os ” & o).Top = Cells(4, c).Top
ActiveSheet.Shapes(“Os ” & o).Left = Cells(4, c).Left
ActiveSheet.Shapes(“Os ” & o).Height = Cells(4, c).Height
ActiveSheet.Shapes(“Os ” & o).Width = Cells(4, c).Width
o = o + 1
c = c + 1
If c = 9 Then
c = 10
osval = osval + 1
End If
Loop
Cells(1, 1).Activate
End Sub
Finally, select cell A1 again, and end the sub at the very bottom of the previous lines of code.
That is the entire VBA project! I added some flare by using images for the sky and ground and filling them with patterns or gradients. I also drew some grass which I used as borders for the play area and bones for the reset button. I hope you enjoy learning from this one and enjoy playing it as well. I will not give the solution to the game here but you can follow this link if you get stuck and want to see the winning solution. See the below gif for the game in action and enjoy!
Download below: